How to Create an OnlyFans Profile Picture: Tips and Examples
Your OnlyFans profile picture is doing more work than most creators realize. It’s the thumbnail fans see in DMs, in notifications, in search results, and nex...

Your OnlyFans profile picture is doing more work than most creators realize. It’s the thumbnail fans see in DMs, in notifications, in search results, and next to every post you publish. If it looks low-effort, unclear, or inconsistent with your niche, people hesitate. If it looks intentional and on-brand, more people click, and more of those clicks become subscribers.
This guide shows you how to create an OnlyFans profile picture that looks professional, protects your privacy, and matches your content style, with concrete examples you can copy.
What an OnlyFans profile picture needs to do (in 2 seconds)
Most viewers won’t study your profile pic. They’ll glance at it.
A good OnlyFans profile picture should communicate three things instantly:
- Clarity: your face, body silhouette, or “icon” is readable at tiny size.
- Positioning: it hints at your niche (girl-next-door, fitness, goth, couples, cosplay, faceless tease, etc.).
- Trust: it looks like a real creator with a real brand (not spammy, not stolen, not a random screenshot).
If your picture does not deliver those three, your bio and content might never get a chance.
Step 1: Choose your profile picture style (decision framework)
Before you shoot or design anything, decide what category you’re in. This prevents wasted time and reduces privacy risk.
| Your priority | Best profile picture style | Why it works | Main tradeoff |
|---|---|---|---|
| Maximum conversion | Clear face close-up | Humans trust faces and recognize you faster in DMs | Higher privacy exposure |
| Strong privacy | No-face “signature” shot (lips, neck, torso crop) | Still feels personal without revealing identity | Slightly lower trust than full face |
| Niche branding | Costume / themed portrait (cosplay, goth, latex, lingerie vibe) | Signals exactly what you sell | Can attract the wrong audience if too generic |
| Professional creator brand | Clean studio portrait with consistent color palette | Looks premium and consistent across platforms | Needs lighting and basic editing |
| Paid traffic funnel (TikTok/IG) | Same avatar across all platforms | Improves recognition and follow-through | Harder to keep accounts separate |
If you’re not sure, pick the style that matches your real constraint:
- If you’re worried about being recognized, start faceless.
- If you’re already public on social media, a clear face shot usually converts best.
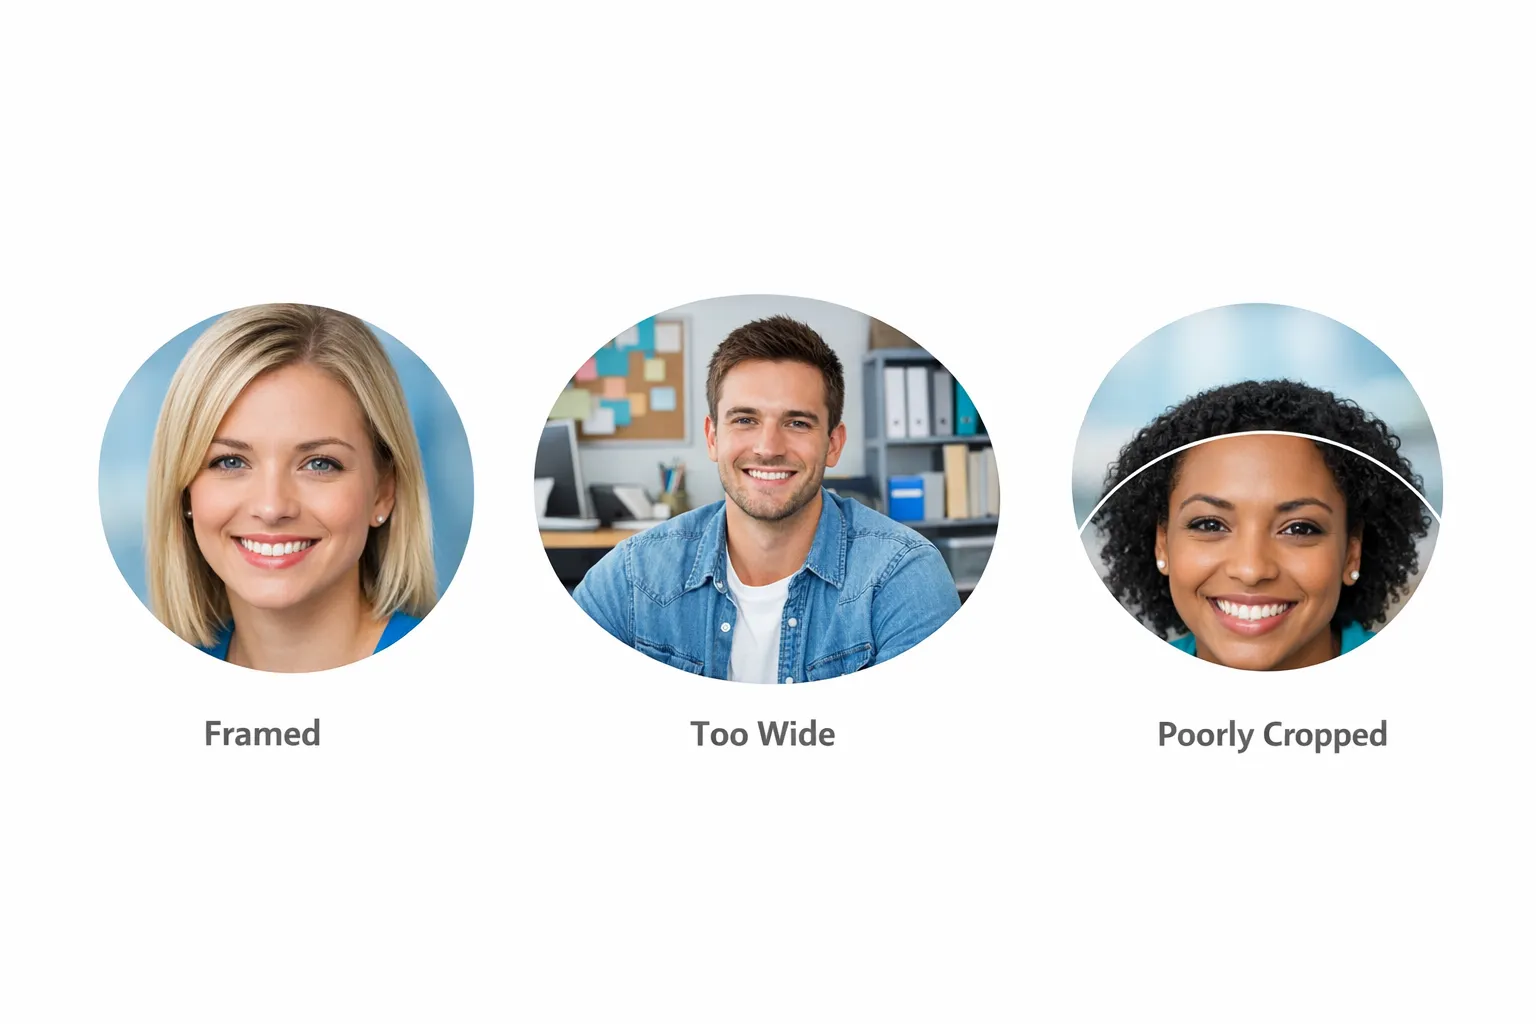
Step 2: Nail the “thumbnail rule” (composition that survives cropping)
OnlyFans crops profile images into a small circle. That means your picture must work when 60 to 80% of the original frame disappears.
Use this simple composition rule:
- Fill 60 to 75% of the frame with the main subject (face, upper body, or signature feature).
- Leave clean space around the edges so the circle crop doesn’t cut your head, chin, or key details.
- Use one focal point only. Busy backgrounds turn into noise.
A quick test: zoom your photo out until it’s the size of a coin. If you can’t tell what it is, redo it.
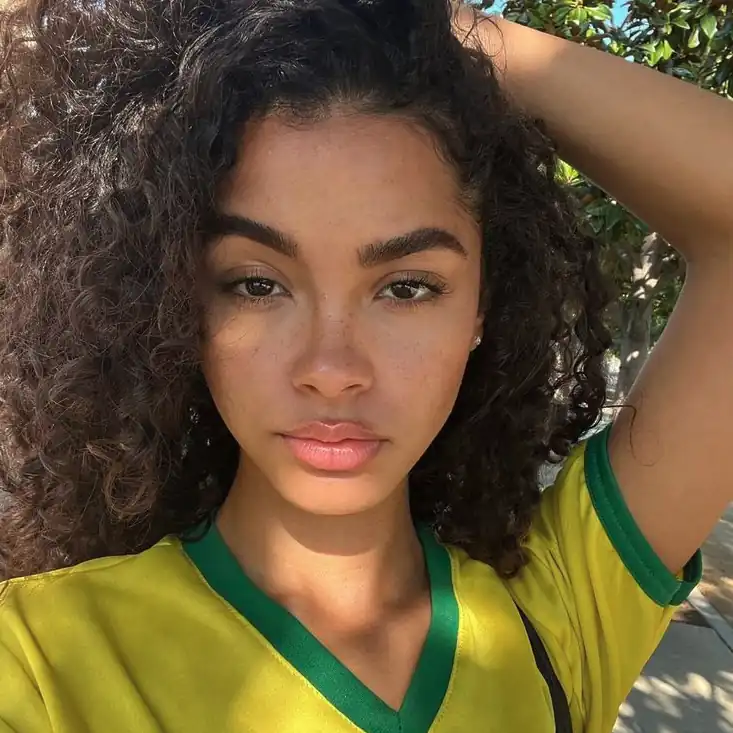
Step 3: Light it like you mean it (cheap setup that looks premium)
Lighting is the difference between “random selfie” and “creator brand.” You don’t need a studio, but you do need intentional light.
The simplest setup that works
- Face a window with indirect daylight (bright shade is ideal).
- Turn off overhead lights (they create harsh shadows).
- Place your phone slightly above eye level.
- Use portrait mode carefully, blur is fine but keep eyes and lips sharp.
If you use a ring light
Ring lights are fine, but avoid the “glowing white circle eyes” look.
- Dim it and move it slightly off-center.
- Add a second light source (even a lamp bouncing off a wall) to soften shadows.
Step 4: Pick colors that match your niche (brand consistency without overthinking)
Your profile picture sets the visual tone for your whole account. Choose a palette that fits your content, then repeat it everywhere (profile pic, banner, pinned post aesthetic).
Here are reliable niche-to-color pairings:
| Niche vibe | Colors that usually work | Why |
|---|---|---|
| Girl-next-door / soft tease | warm neutrals, cream, blush | feels approachable and intimate |
| Fitness / athletic | high contrast, clean whites, bold accents | looks energetic and “clean” |
| Goth / alt | black, deep red, purple, metallic | signals subculture instantly |
| Luxury / high-end | black, gold, beige, minimal tones | feels premium and exclusive |
| Cosplay | saturated theme colors | communicates character fast |
You’re not locked in forever, but changing your look weekly makes it harder for fans to recognize you.
Step 5: Retouch lightly (the goal is polish, not a different face)
Over-editing can hurt trust and can also make your content feel inconsistent.
Aim for small, realistic improvements:
- Adjust exposure and white balance
- Reduce harsh shadows
- Slight skin smoothing (avoid plastic texture)
- Sharpen eyes or lashes slightly
If you plan to use the same image across multiple platforms, keep a master copy and export platform-specific crops.
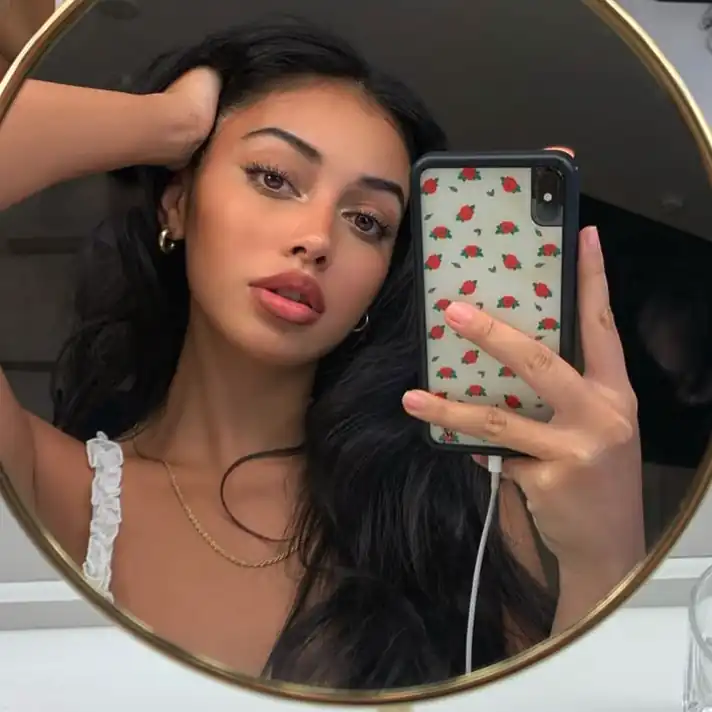
Step 6: Protect your privacy before you upload
If privacy matters to you, treat your profile picture like a public advertisement, because it is.
Practical privacy checklist
- Do not reuse a personal Instagram/Facebook profile photo. Reverse image search can connect accounts.
- Avoid unique backgrounds: your bedroom, car interior, workplace, street signs, and mirrors can reveal location.
- Remove metadata (EXIF) before uploading, especially if you shot on a phone.
- Don’t wear identifying items (work badges, school logos, distinctive jewelry you wear in real life).
- Consider a “faceless but personal” angle (crop from nose down, or use hair/neck/lips as the signature).
If you already run a separate creator identity, your profile pic should match that identity, not your offline life.
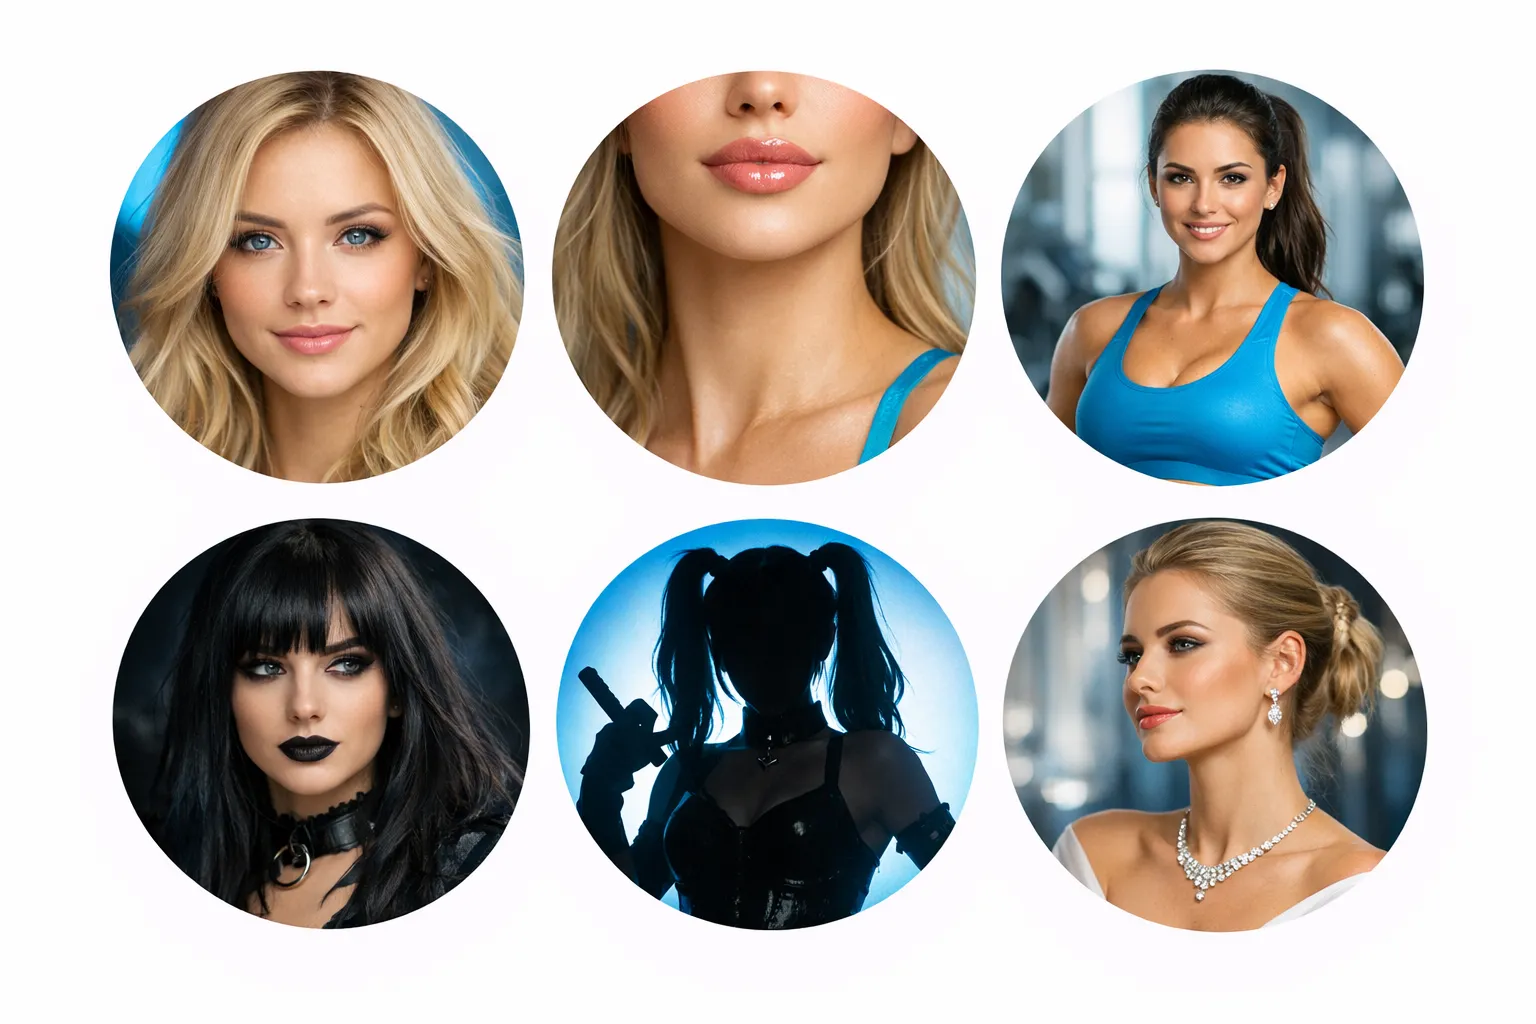
Examples you can copy (by creator type)
Below are proven profile picture concepts. They’re described in a way you can recreate with a phone.
1) The high-converting face close-up (best for trust)
- Tight crop, eyes in focus
- Soft smile or confident neutral expression
- Plain background
- Simple makeup that matches your content vibe
Works best for: creators who show face publicly and want maximum conversion.
2) The “faceless signature” crop (best for anonymity)
- Crop from lips to collarbone
- One accessory that becomes your brand (choker, lace, tattoo you’re okay revealing)
- Consistent lighting and color
Works best for: no-face creators, teachers, healthcare workers, anyone protecting identity.
3) The niche uniform
You create one “uniform” look and repeat it:
- Fitness: sports bra + clean background
- Goth: dark eyeliner + black outfit
- Cosplay: one recognizable character silhouette
Works best for: niches where fans want a specific aesthetic consistently.
4) The premium minimal portrait
- Neutral face shot
- Clean outfit (lingerie is optional)
- Minimal editing
- Luxury palette (black/beige/gold)
Works best for: higher-priced brands, VIP-heavy strategies.
5) The playful “tease without nudity” concept
- Oversized hoodie off one shoulder
- Bedroom lighting but with clean background
- Flirty expression, no explicit framing
Works best for: creators who market SFW on mainstream platforms and convert inside.
Common profile picture mistakes (that quietly kill clicks)
Too wide, too busy
If your full body is visible with lots of background details, you become unrecognizable in the circle thumbnail.
Fix: zoom in, simplify the background, and commit to one focal point.
Overly explicit thumbnail
Depending on where your traffic comes from (and what platforms you use to promote), an explicit profile image can create avoidable friction. It can also attract low-quality traffic that doesn’t convert.
Fix: use a suggestive, high-quality portrait and keep explicit content inside the paywall.
Filters that scream “fake”
Heavy beauty filters can reduce trust and increase refund requests or complaints because your feed won’t match the avatar.
Fix: light retouching only.
Inconsistent branding across platforms
If your Twitter/X avatar is one look, your Instagram is another, and your OnlyFans is a third, you lose recognition.
Fix: keep the same photo or the same style family (same crop, same palette, same “signature”).
Quick build: a repeatable 20-minute workflow
Use this every time you refresh your branding.
- Pick your style (face, faceless signature, niche uniform).
- Shoot 30 photos near a window, same angle, same background.
- Select 3 finalists and test them as tiny thumbnails.
- Edit lightly (exposure, color, slight smooth).
- Export 3 crops (square, circle-safe, close-up).
- Upload and commit for at least 30 days before changing again.
Consistency matters because fans start recognizing you in DMs, and that recognition can improve response rates.
If you funnel traffic from Instagram, match your avatar to your growth plan
Many creators use Instagram as a “soft” top-of-funnel and then convert followers to paid platforms. In that setup, your profile picture is part of the funnel because it’s the visual bridge between platforms.
If you’re doing Instagram outreach or lead nurturing at scale, tools like Orsay AI for Instagram prospecting are designed to automate qualified engagement and fast follow-ups, but they work best when your profile looks credible at a glance. Your avatar is a big part of that credibility.
When it’s worth getting help (and when it’s not)
DIY profile pictures are totally fine if:
- you already get clicks and conversions
- you’re consistent and recognizable
- your privacy risk is low
It may be worth getting professional input (branding, content direction, or account management) if:
- you’ve improved content but your traffic or conversion is still stuck
- you’re afraid of being recognized and need a safer brand system
- you’re overwhelmed and can’t keep consistency
At Lookstars, creators typically come to us for full OnlyFans account management, including marketing, fan engagement, and privacy-focused setup. If you prefer staying hands-on, you can still use the frameworks above to build a profile picture that converts and protects you.
The simplest rule to remember
Your OnlyFans profile picture is not about looking perfect. It’s about looking intentional, recognizable, and on-brand, in a tiny circle, to the exact audience you want.
If you get those three right, the rest of your profile finally gets a fair chance.

Ready to transform your career?
Join hundreds of creators already earning six figures with Lookstars Agency.
Share this article
Best OnlyFans Agency
Europe's Leading OnlyFans Management Agency.
100% Free Ebook
Get our guide and unlock the secrets to OnlyFans success.
100% Free Ebook
Get our guide and unlock the secrets to OnlyFans success.
Free Revenue Calculator & Profile Analyzer
Try them for freeContinue reading...
Am I Attractive Enough for an OnlyFans Agency? The Answer

Can You Ever Fully Delete Your OnlyFans Content? The Reality
